

3 easy ways to make text and interface elements bigger in Windows
Windows 10 and 11 will let you adjust font size and window interface elements to your liking. There are three options that compound when used together.

I know it has been a long time since the last PC is Dead, Again newsletter, but this is how I work: I keep a long streak and then pause for a long time when I miss just one deadline.
I hope you are all well and I wish you a Merry Christmas and a Happy New Year!
Now let’s get back on track with my PC tips:
As with many things in Windows, there are multiple options to achieve something. It may seem various options to the same thing, but when taking a deeper look the differences may become clear (or not).
Same goes for increasing the size of the elements you see on screen. Long gone are the days when Windows would look the same on every device for the same given resolution.
As screen sizes and display resolutions are not more varied than ever, it is crucial to be able to adjust the size of text and app interface elements for a comfortable viewing.

Much has been said in the past about how Windows works with scaling, but for the most part I think you will be satisfied with how it is done today in Windows 11.
I say “for the most part” because legacy apps that have not been updated may still render in a slightly blurry fashion. Other than that Windows does a good job of handling text and interface rendering nowadays.
So much so, that you have three big options at your disposal to adjust screen elements. And I am going to walk you through each of them in this short post.
1 - Increase text size everywhere
The first option will let you increase the text size displayed on screen, in every app except the task bar, from the default 100%. You can go up to 225%, but I reckon for most people that would be too much.
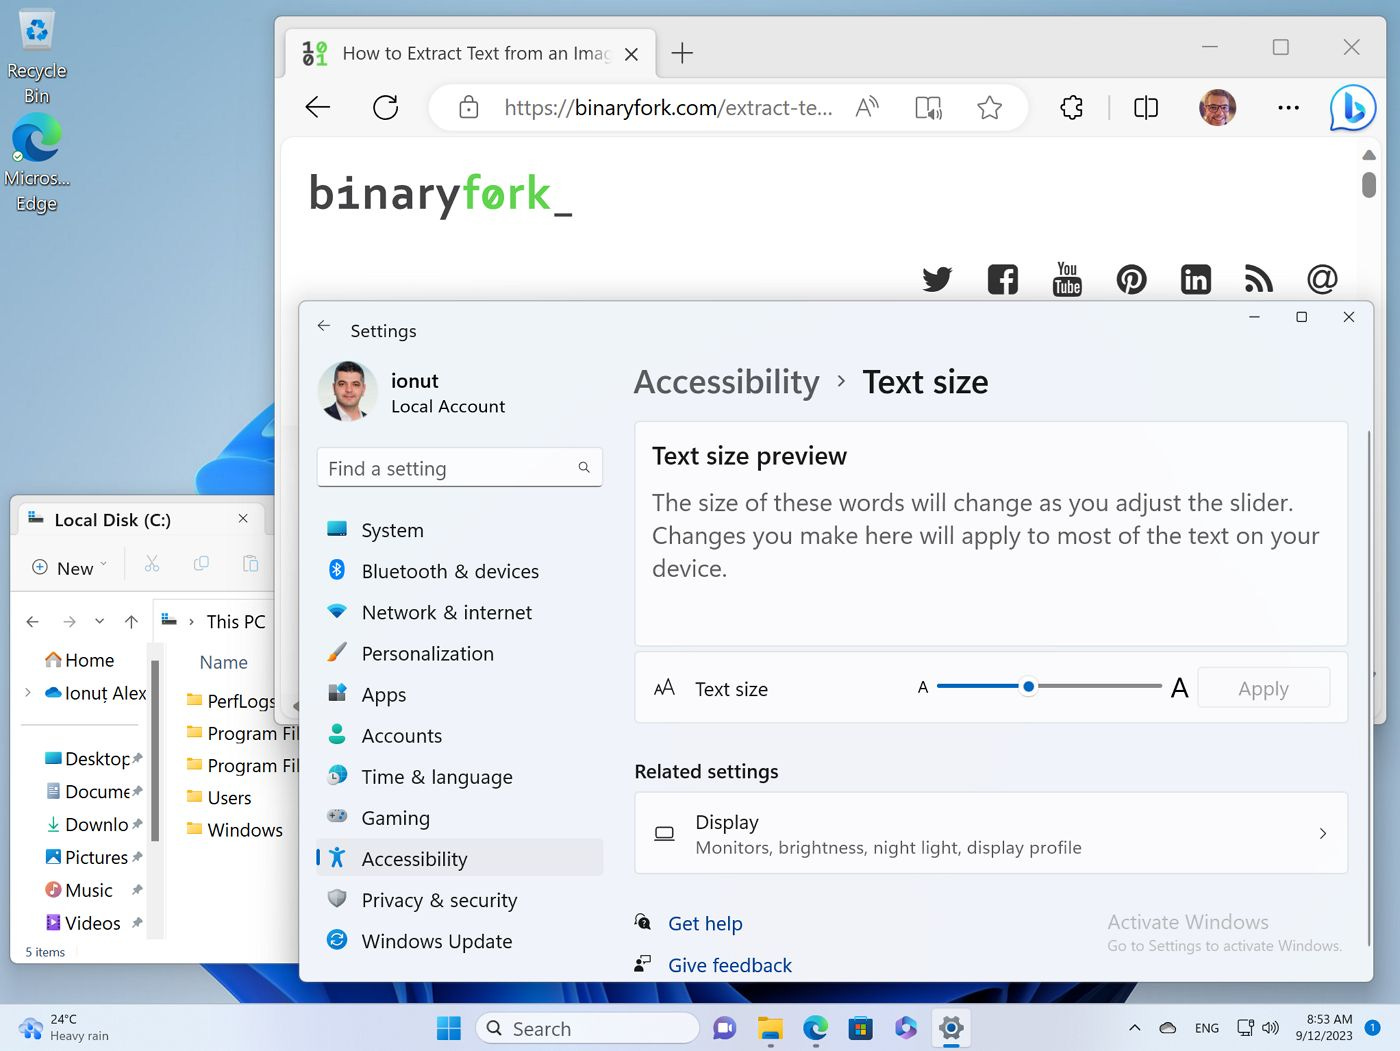
To change this setting, you will need to launch the Settings app (you can press Win + I for easy access), navigate to the Accessibility section and click on the Text size option found in the Vision subsection.
In the next screen adjust the slider and preview your changes in the box above the slider, then hit Apply to submit the changes.
A restart or at least a log off is recommended for the setting to apply on those stubborn apps that don’t recognize the changes.
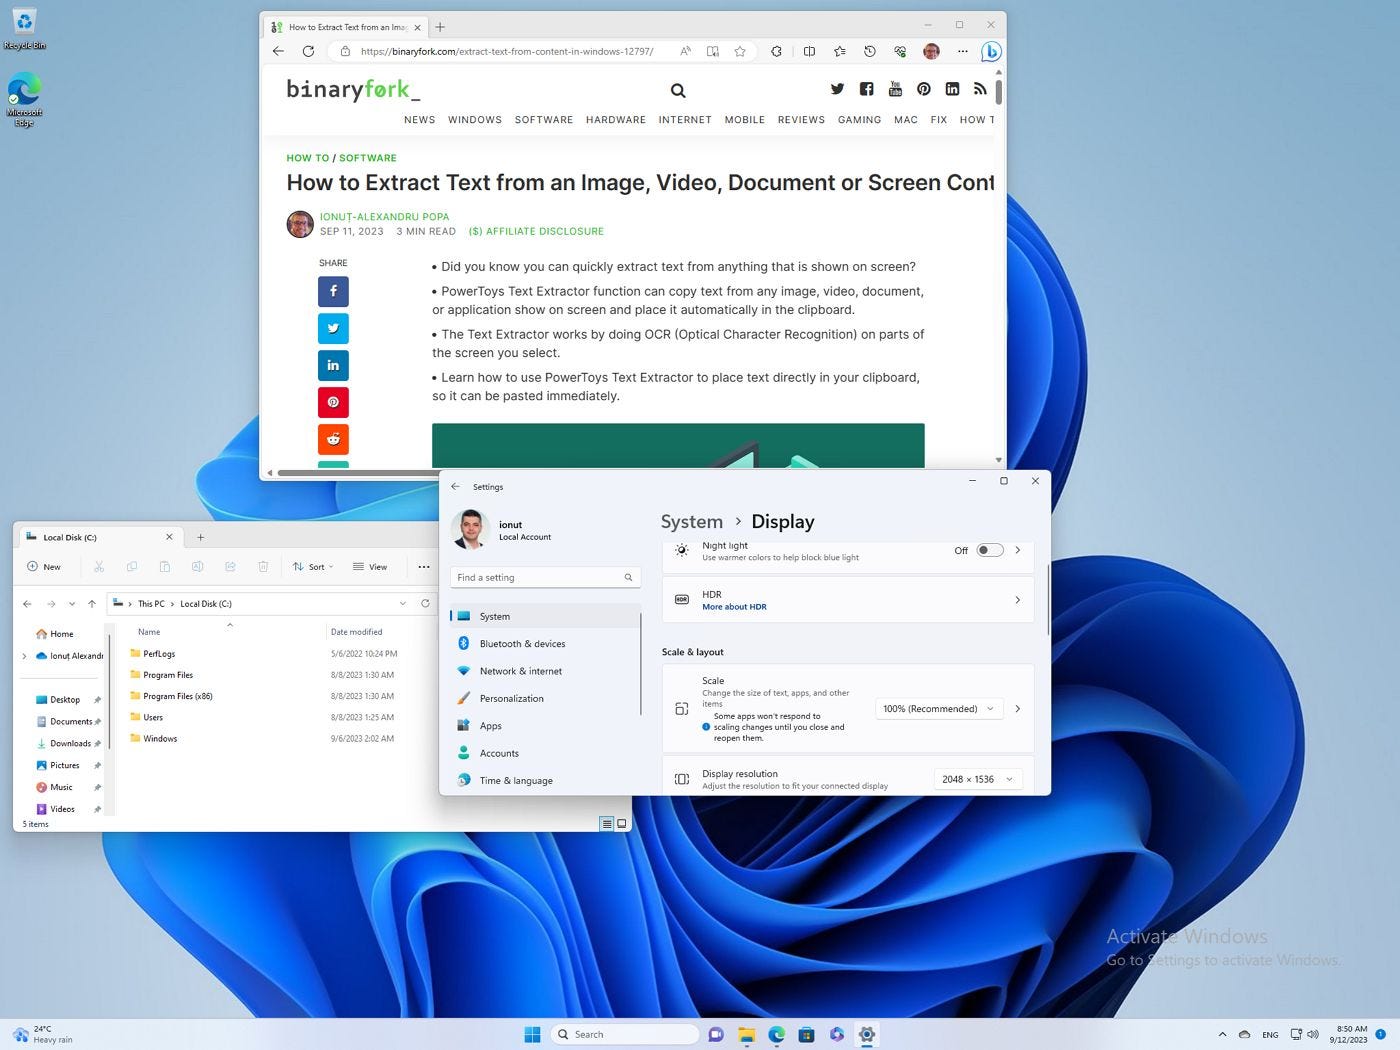
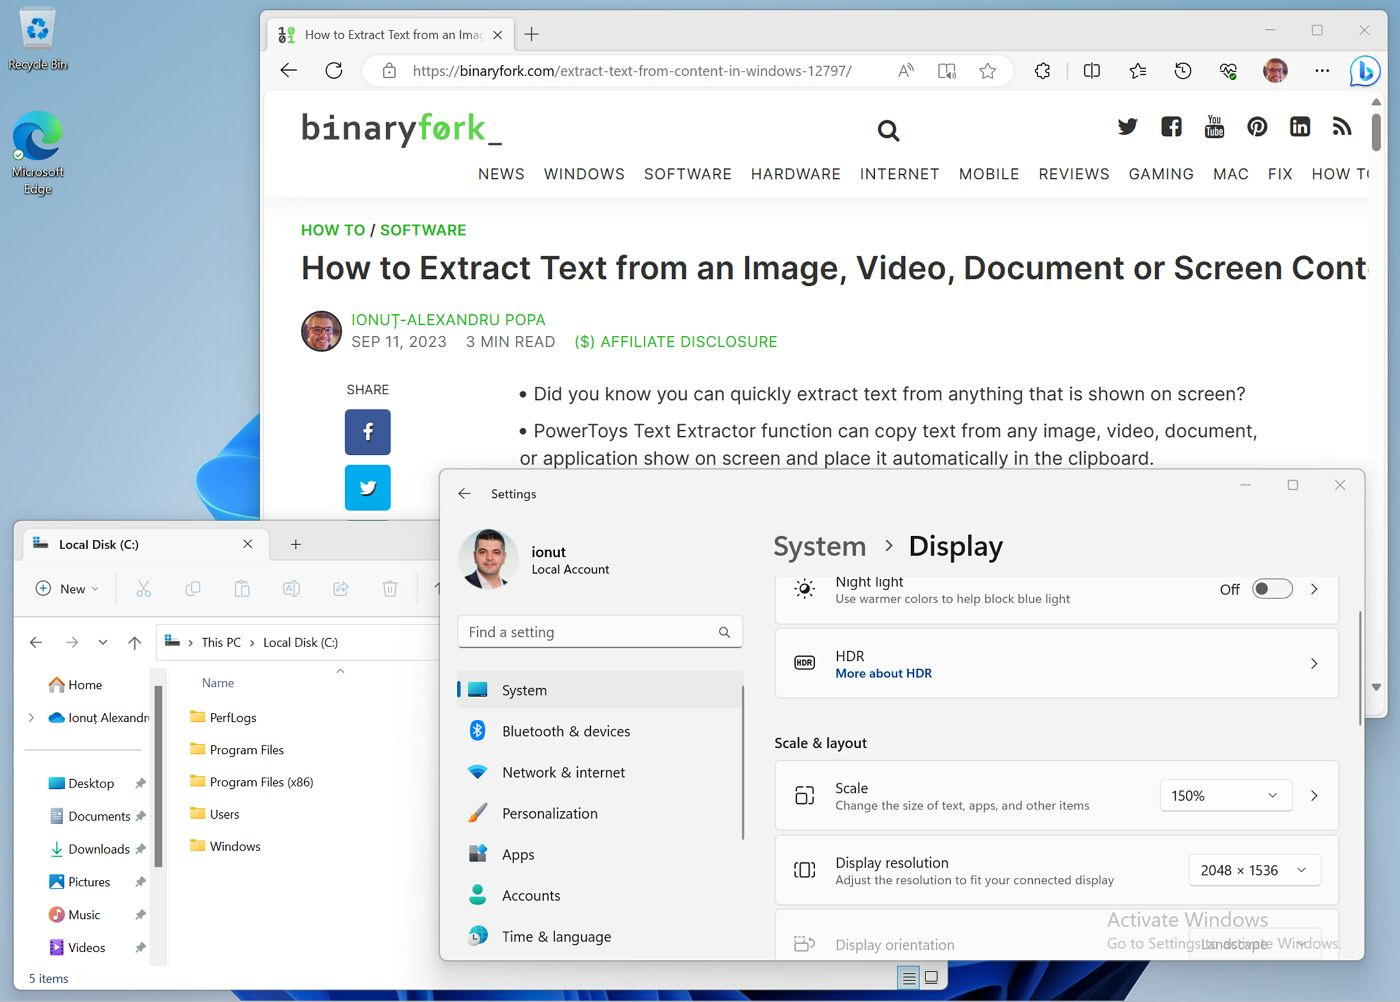
Here is the difference in practice between 100% and 150%.

2 - Make everything bigger with Windows Scaling
This is an option that changes everything you see in the same proportion. And I mean EVERYTHING.
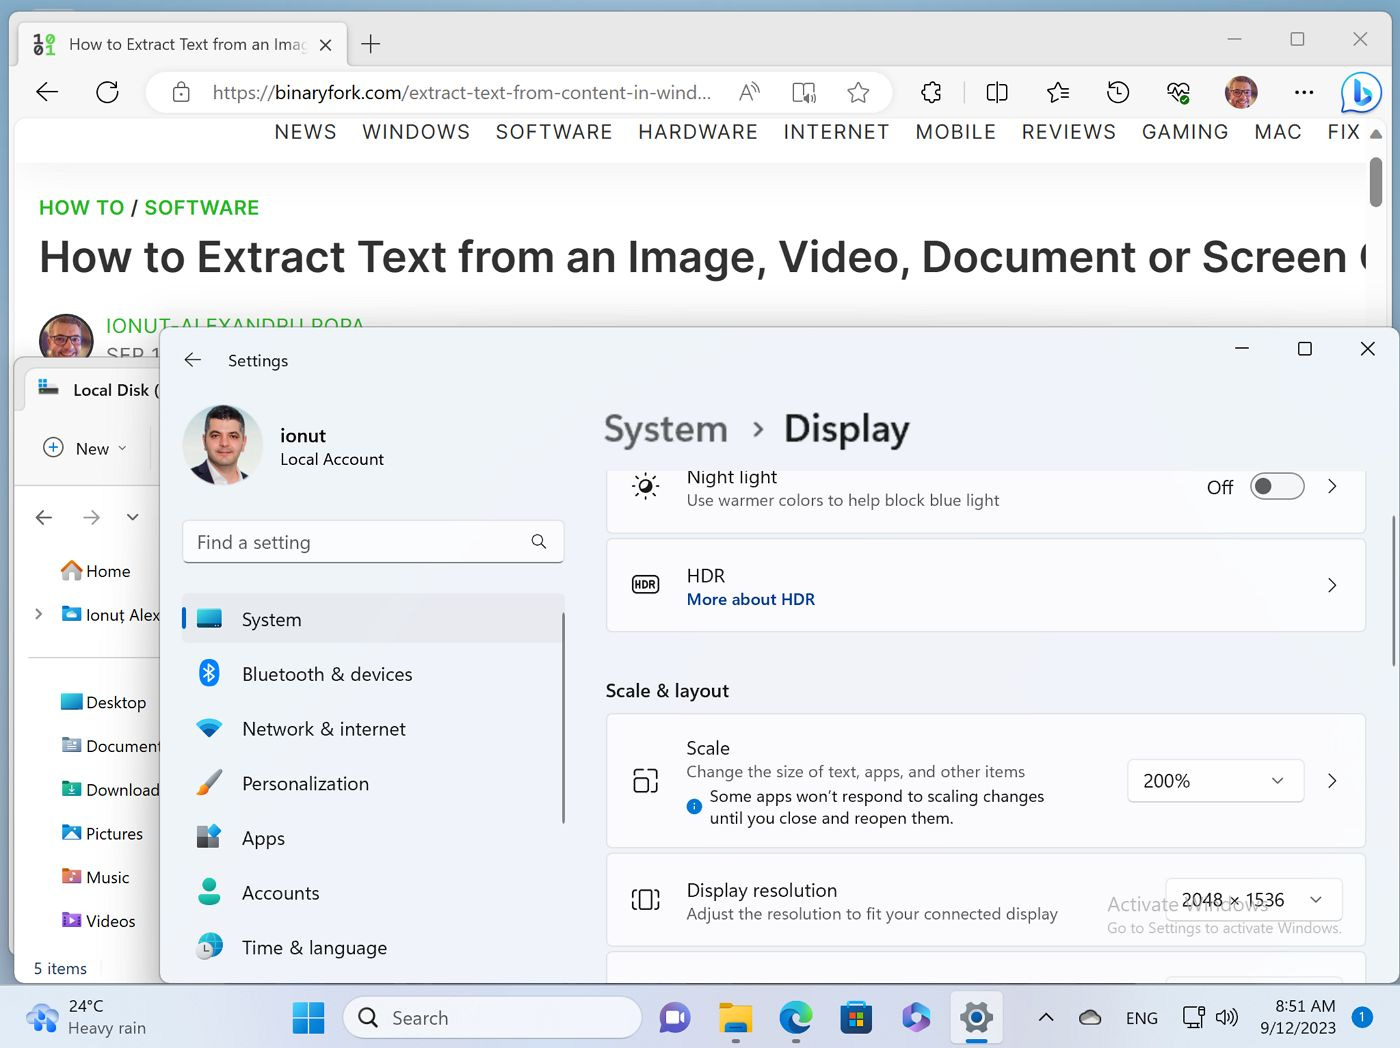
Open the Settings app again, navigate to Display, then select the desired monitor (if you have more than one that is), then look for Scale under the Scale & layout subsection.
You have options ranging from 100% up to 250% in 25% increments, then two more options for 300% and 350%.
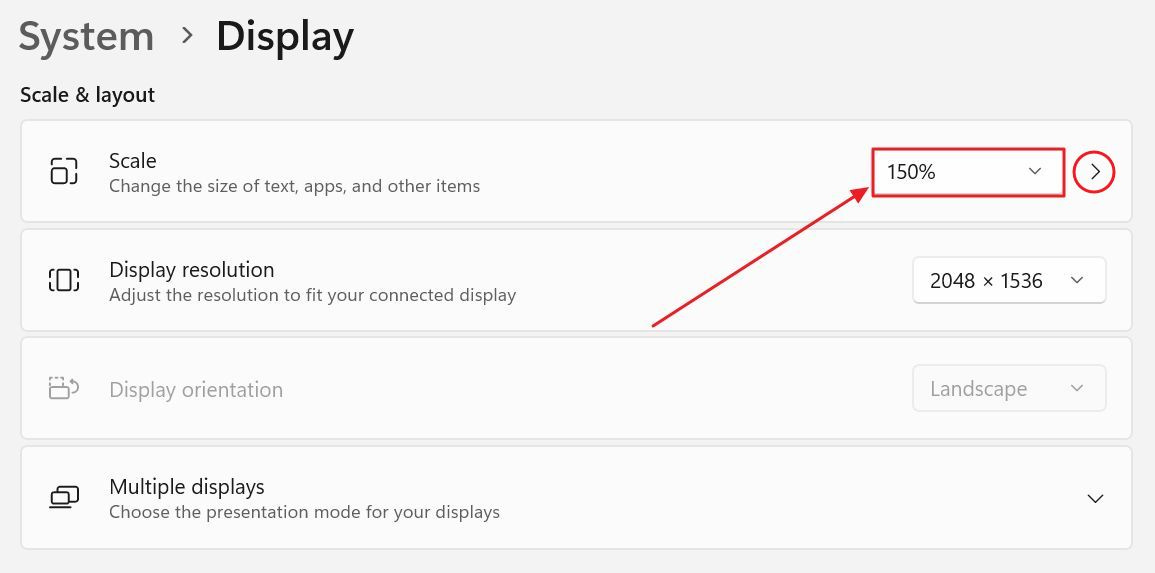
Clicking on the right pointing arrow will let you set a custom scaling ratio between 100% and 500%. The biggest caveat if you’re using this option is that it will be applied to all monitors. Not great if these monitors are different sizes and resolutions.
For reference, here are the differences in size between 100, 150, and 200%.
3 - Zoom in on a specific app
And the final option is to zoom in or zoom out in the browser and supporting apps. OK, it works mostly with the browser, but some apps allow zooming on their content as well (Adobe suite, Microsoft Office, just to name the popular programs).
Zooming is done through the browser settings menu, but I always prefer to use the keyboard shortcuts:
Ctrl + Plus - zoom in one step.
Ctrl + Minus - zoom out one step.
Ctrl + Zero - reset the zoom level to default.
The cool part is that browsers remember the zoom level you have set manually for each web domain, so you don’t have to do it all over again if you’re revising the same website.
How I’d use those settings
Actually, this is how I do use them: first I set scaling for each of my monitors, then fine tune the text size using the Accessibility option. Finally, if I find the text still too small in one of the apps I am using, I will try and zoom in that app alone, if the option is there.
Previous articles you may have missed
One of the best hardware investments I have made in the past decade was to buy an MMO mouse, aka a mouse with a lot of buttons. Mapping the most important actions to my mouse saves a lot of time each time you use these shortcuts. Oh, and it is also great in games, as you can imagine.