

Quick tip on how to save all images in a Word document
If you need to quickly save all files from a Word document, there are two fast ways to do it.

I often receive content to add to a website I manage in the form of a Word document with badly formatted text, tables, and images that are not only low resolution because of the way Office saves media, but also a nuisance to save one by one.
It’s very annoying and takes a lot of time for both the person who makes the document and the one who has to process it.
Fortunately, there are two very quick methods to extract images from a Word document. Shout out to my girlfriend for showing me this. Both methods are really cool and feel a bit geeky, which is always a bonus for me.
Mention: these two methods only work with Microsoft Word documents saved in the DOCX format. They don’t work with old DOC documents (pre-Word 2007).
Let’s start with the document. For the purpose of this demo, I took a template restaurant brochure with quite a few images.
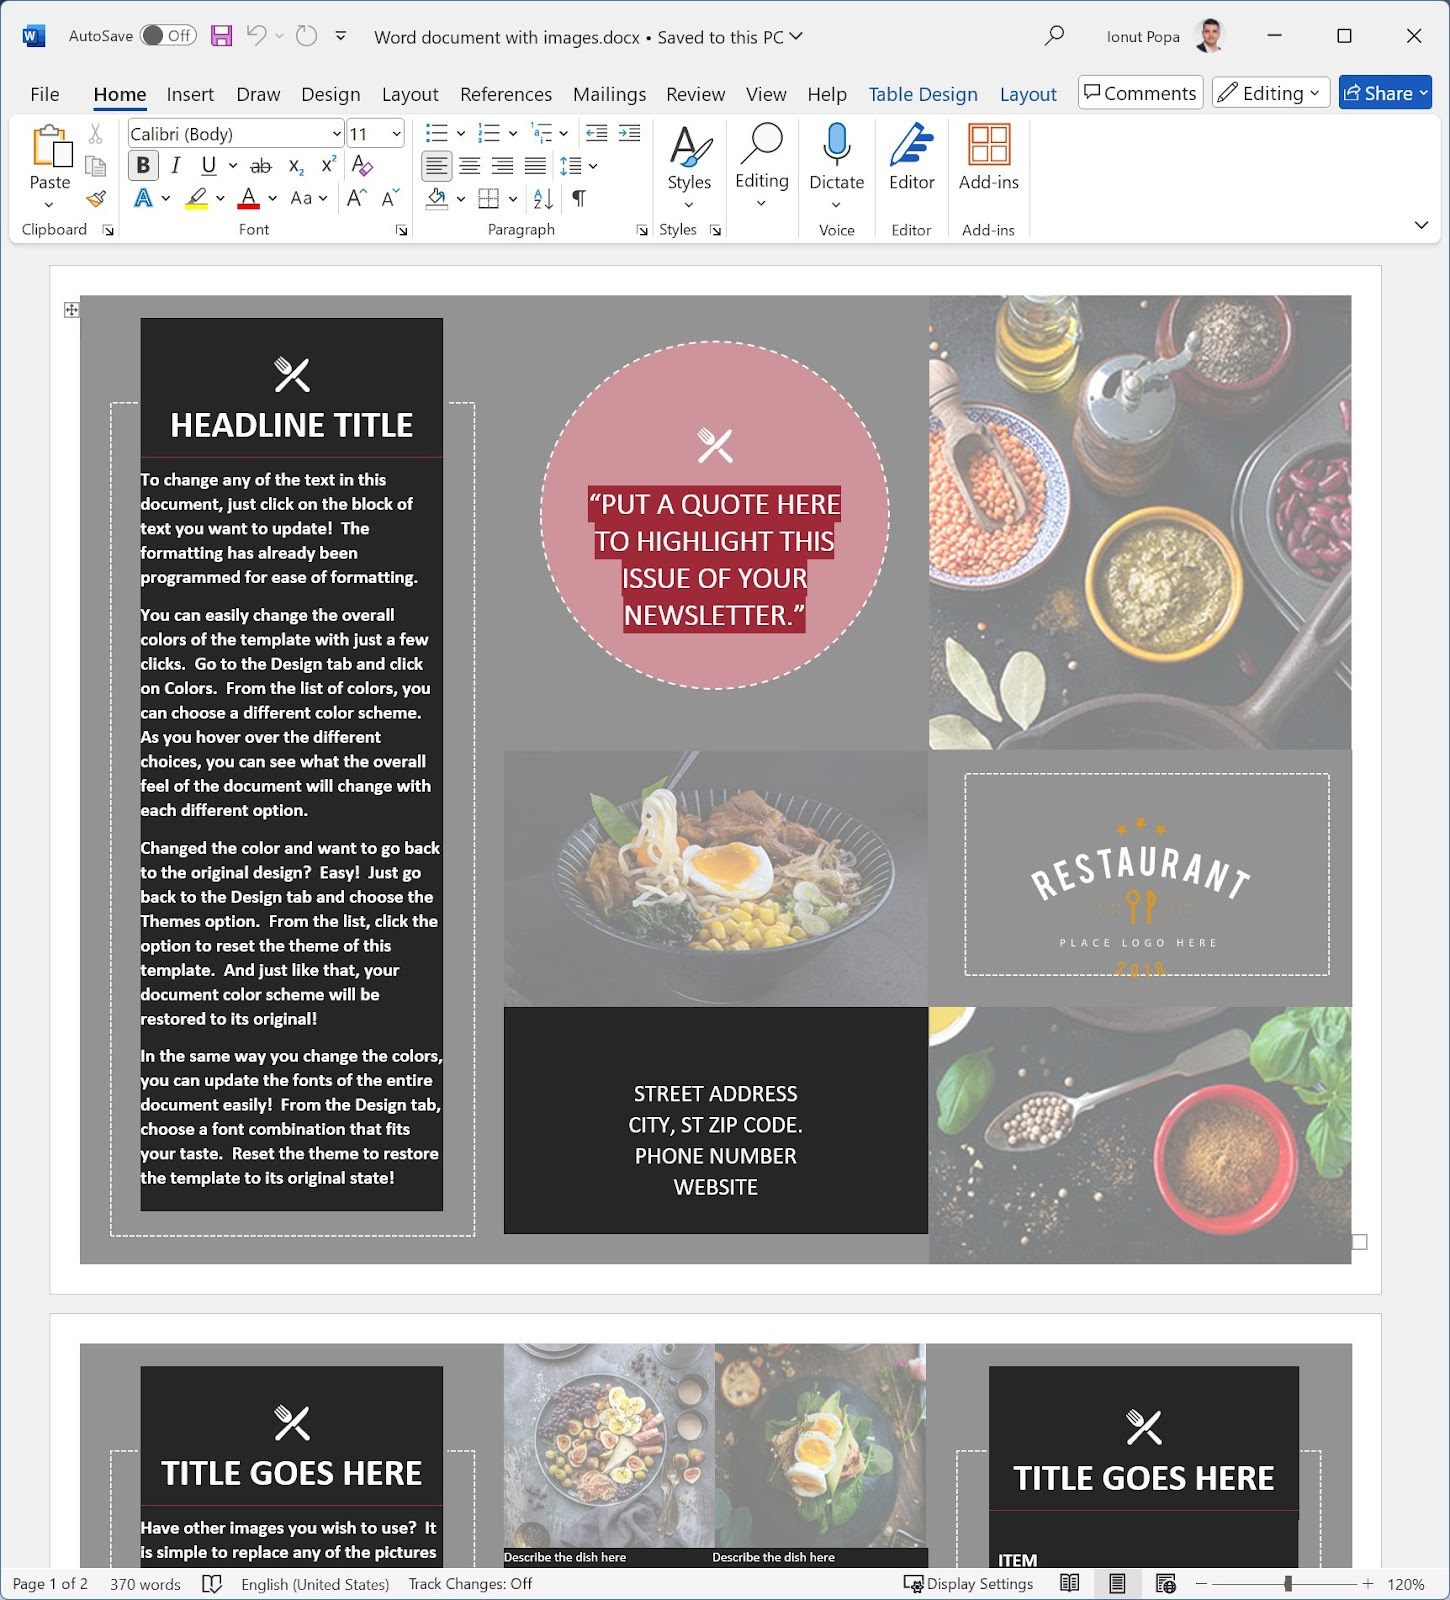
Some of these images are background images, which makes them really difficult to right-click and save.
Difficult if you don’t apply one of the methods below.
Change document extension to Zip
In case you didn’t know, DOCX files are actually archives which contain all the media, document metadata, and the document text contents itself.
So, go to the folder where the original document is saved. I would make a copy first just in case you mess up something.
Select the document and press F2 to rename. You have to delete the “docx” text after the final dot and change that to “zip”.
A warning will let you know that the file might become unusable if you change its extension. Don’t be shy and go ahead.

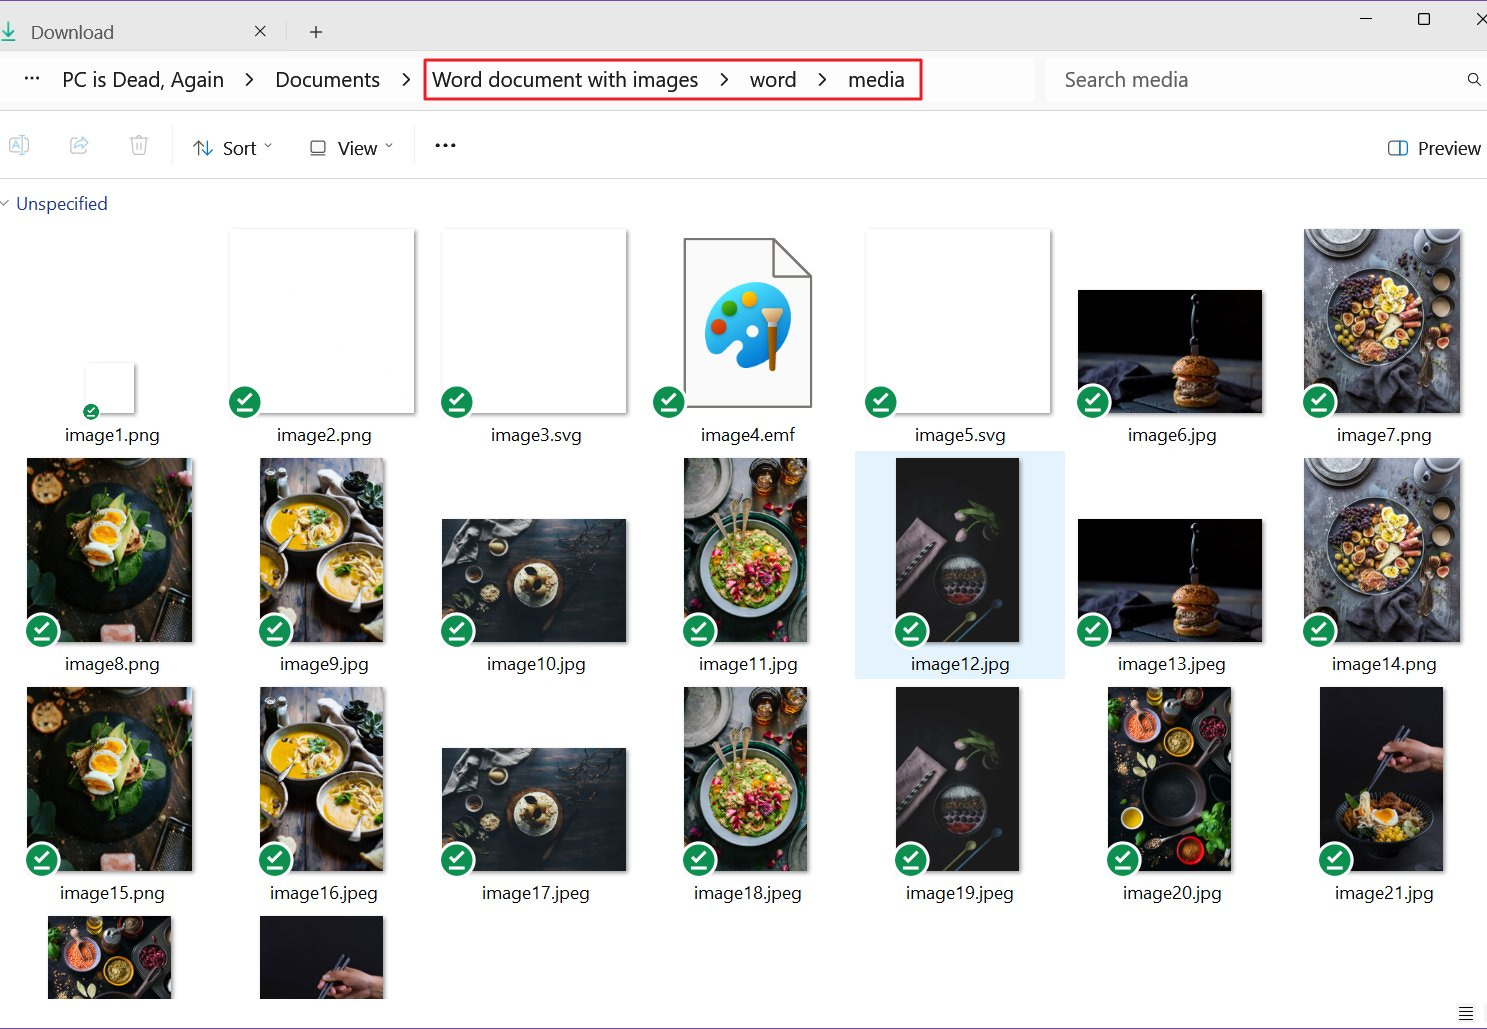
Now you have to right-click the renamed file and extract the archive contents. You don’t have to do it in the same folder, but make sure you remember where you have extracted the document contents because that’s where you have to go next.
Open the folder and further navigate to Word > Media. This is where you’ll find all the images stored in the original document. Move them, copy, rename, edit, do whatever you meant to do in the first place.
I also made a video showing exactly how this works:
Save document as a web page
The second method is just as easy, if not easier.
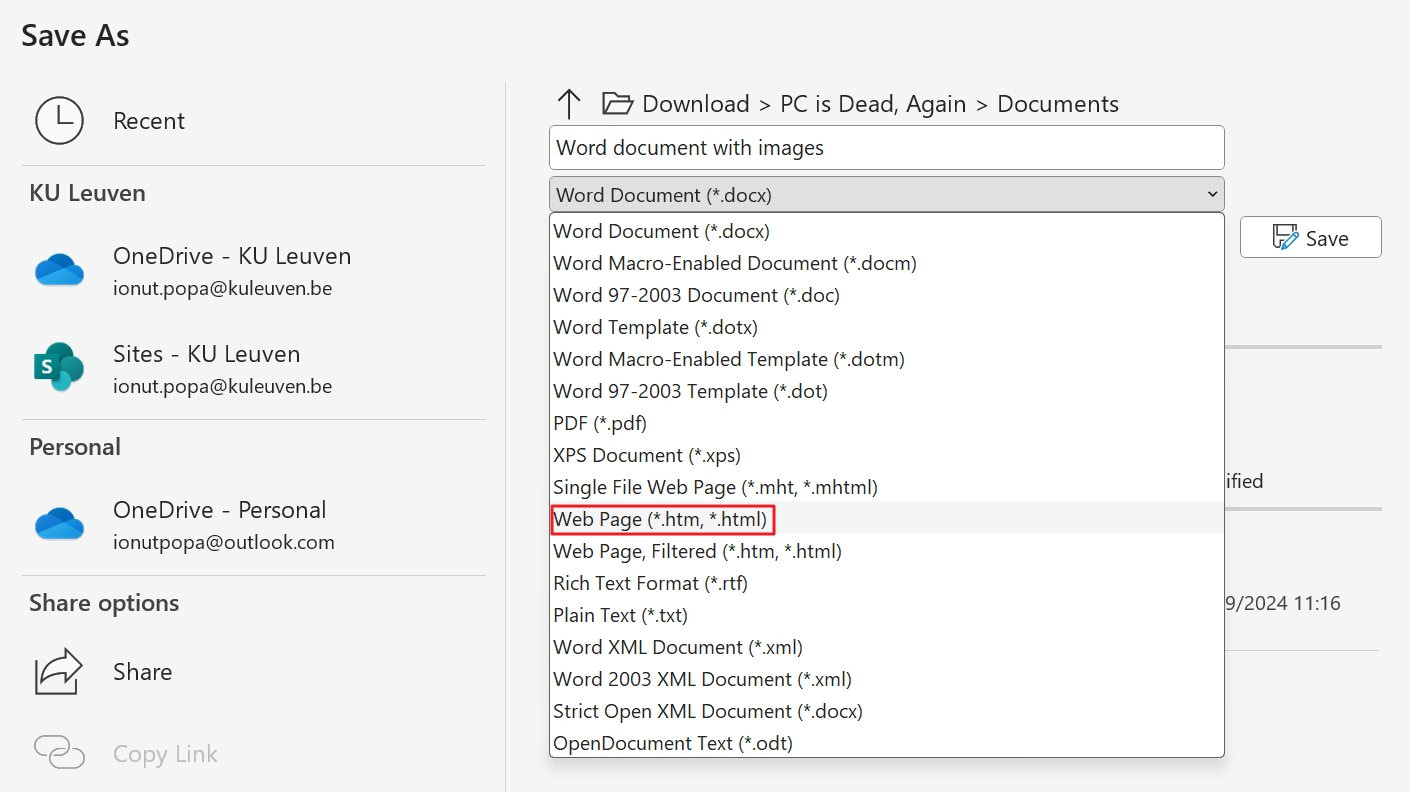
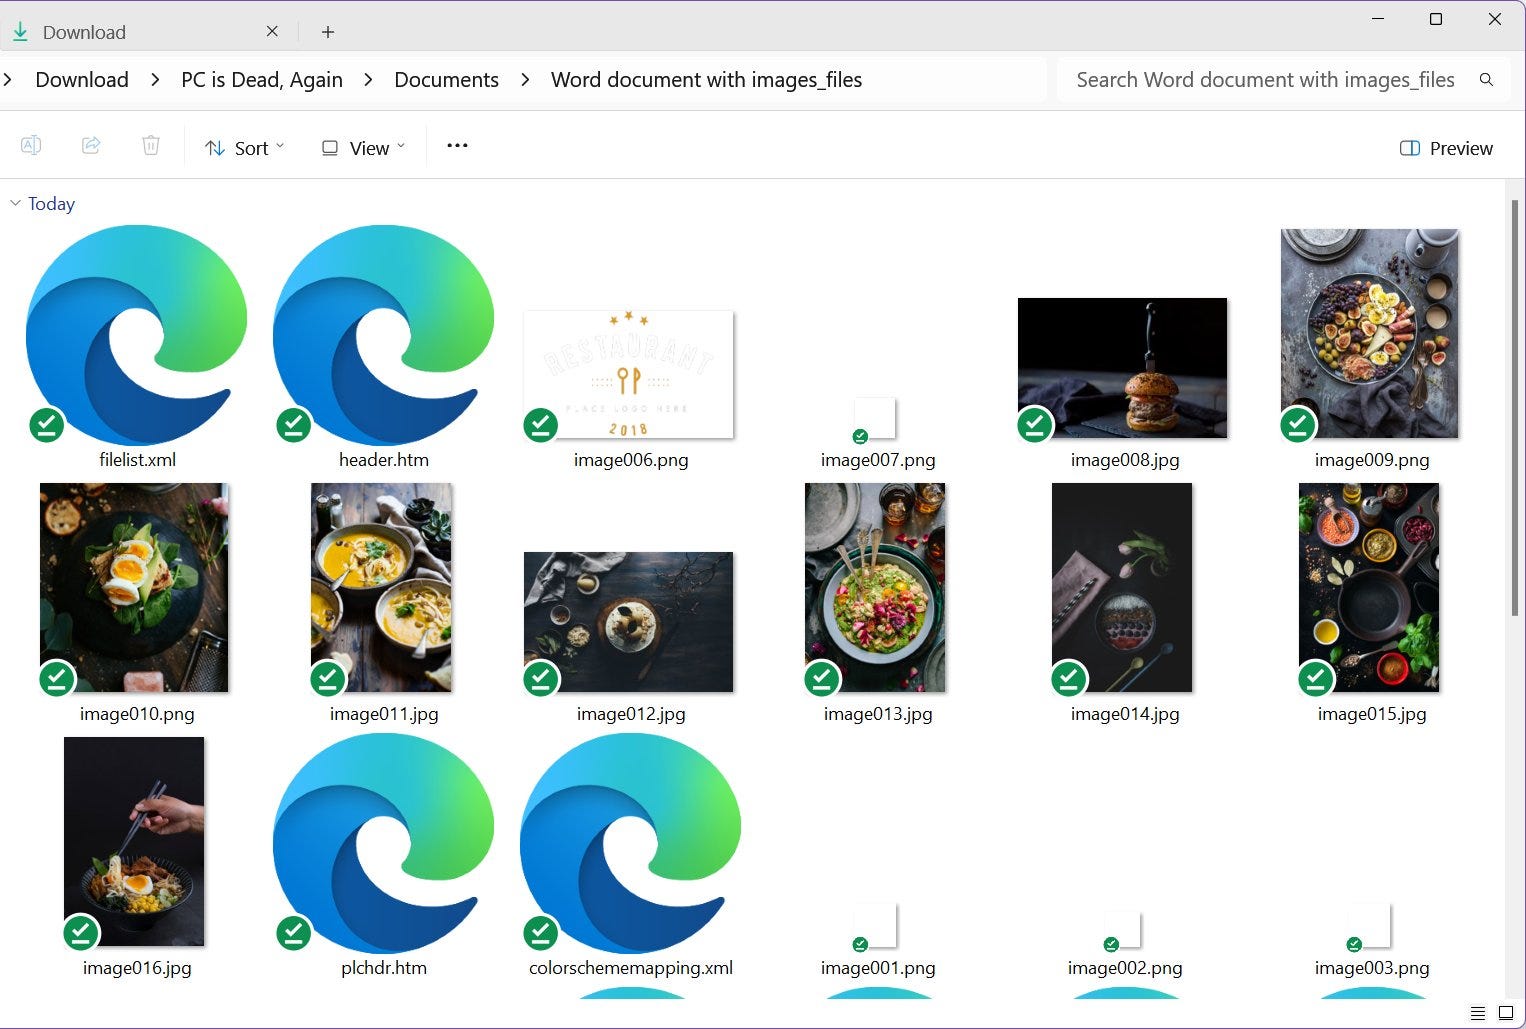
Open the document with Word and save it as a web page (htm, html).
Now navigate to the folder where you saved the HTML file, and you’ll see the file itself and a new folder which contains all the media from the original document.
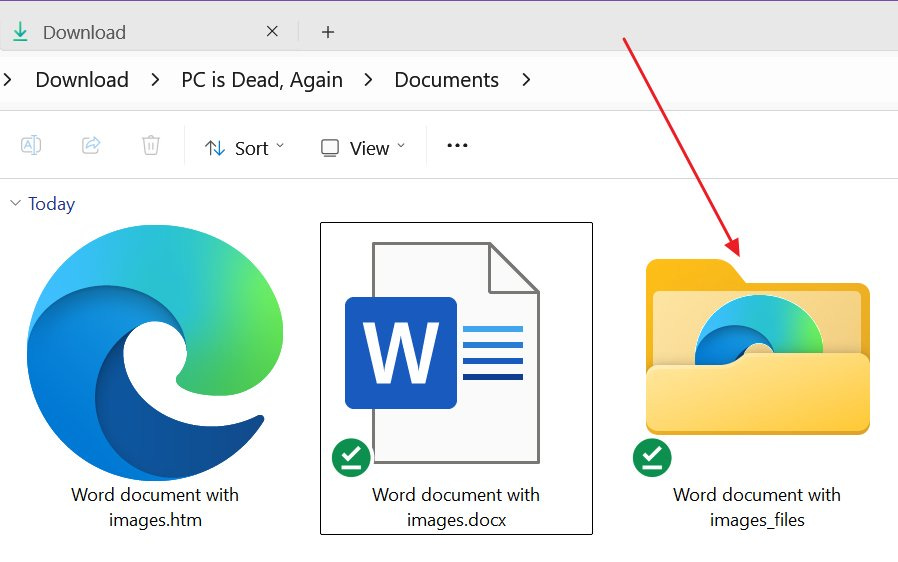
Open this folder and you will find all the inserted images together with some document metadata and other HTML elements which you can just ignore.
And that’s it, now you know two very fast methods to extract all images from a Word document.
If there’s a takeaway to this is that you shouldn’t send a word document with images if that is not the final version of the document. If it’s meant to be processed further, I urge you to also attach the original images and tables in Excel format even if they’re much bigger in size together.
That’s actually the point, to have the original images which are higher resolution and are also renamed properly. Once inserted in a Word document all images are renamed to image001.jpg to image999.jpg automatically.
Anyway, I hope you remember this trick because it helped me so many times I cannot count.
Previous articles you may have missed
If you are keeping specific browser tabs opened at all times it is possible to install websites as desktop apps and detach them from your browser completely. It’s easy to do and can be reverted at any time.